
People these days do a lot of digital painting. I have a soft spot for traditional media. This is in acrylics, I work mostly in acrylic these days. Every medium works a little differently so if you want to try this method use acrylic paint. Also, these are not rules, more simply how I did this specific painting. The only real rules are the physical limitations of the media, and you can't break those unless you are a wizard.
Step 1: Background.
I threw down a background colour. This is mostly paynes grey and white. I let it dry and put another layer of the background down. Acrylic isn't completely opaque so it takes a few layers before the white stops showing through the paint. I like making a faux vignettes so I did that here. I used a big brush to keep it loose looking. I always mix my colours and use primarily dull colours. Get a lot of browns and greys and always mix a touch of the colour you'd like it to be into it, this way you wont hurt peoples eyes with your colour choices. if you mix a tone at once you can make it look very flat, but here i only mixed a bit at a time and that makes the colour look varied.
Step 2: Sketch.
I always do the sketch after I put the background colour on. This way I don't need to fuss about covering it. Your background has to be completely dry though or else it doesn't work very well. I learned from trial and error that pencil, pen, charcoal and anything that is black are not good for making your drawing. Ideally you want to use something that if it blends with the paint you wont care. I use a light brown pencil crayon or a peach colour stick.
Step 3: Colour Blocking
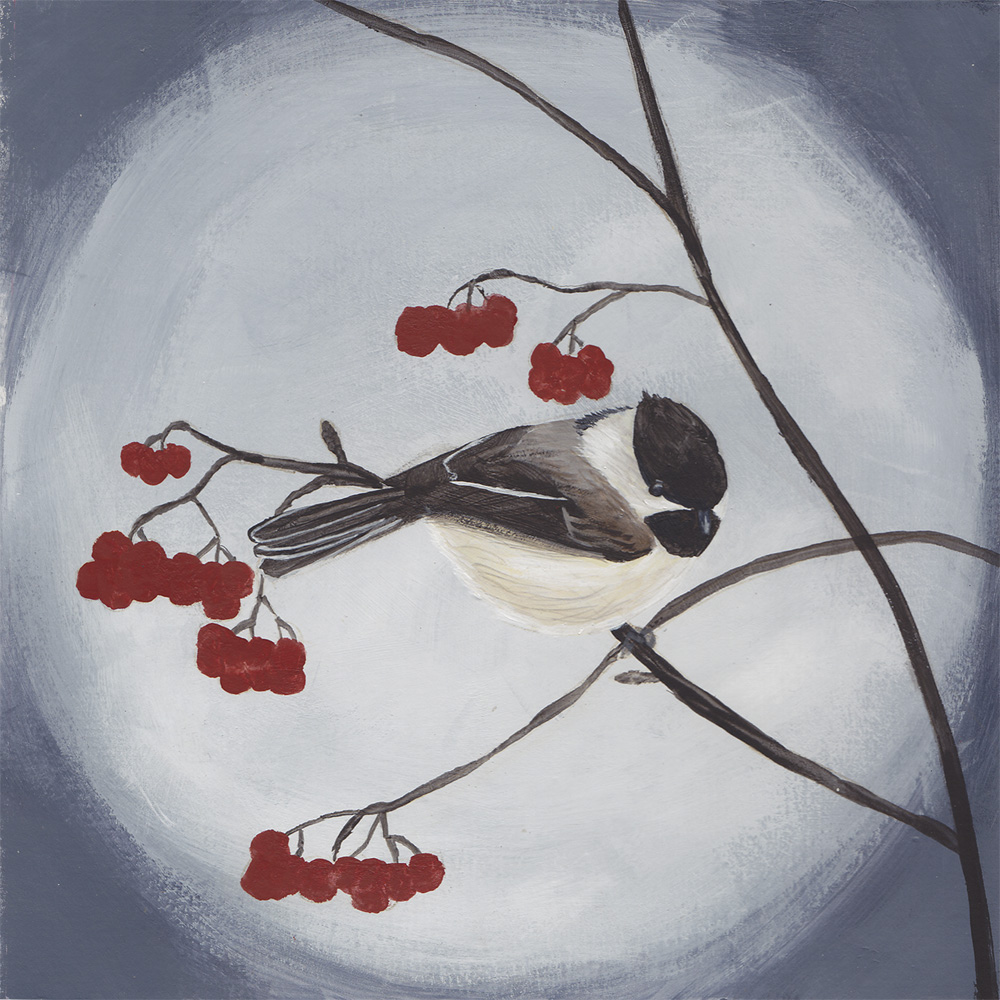
As I said before acrylic isn't completely opaque, so first you just need to get the first layer down. I put general colours in general areas. no fussing about details, its going to look a bit shitty anyway cause the background shows through. Its good to put down the colour that is behind the detail, the detail often changes the colour drastically, if theres a bunch of white lines or hairs, the area might look white, but if you look between the lines theres offwhite or taupe, so block in that colour, not white.Its easy to go a bit darker and a bit lighter from a middle ground, so when in doubt throw down the middle colour.
I only used 5 tubes of pait for this painting: paynes grey, naples yellow, white, raw umber and red. The more tubes of paint you use the more likely that you will make bad colour choices. If you mix colours from a few tubes all your colours will go together, you will find new ways to make the colours you want and you will become a better artist.

before you fuss about detail you should fuss about shape. think about lights and darks, shadows and higlights. When blocking in colour you might have lost some lines from your sketch that define certain shapes save them, before you forget where they were. Use thin coats to make variety in the same colour rather then blocking in new colours. Paint in the direction that you will put the details, that way you don't have as many details to make.
No comments:
Post a Comment